 ParaDocs Files
 My Imaginary Human
Filming kit can be expensive. If you’re not sure how much it will be used it’s a massive outlay, so why not go the DIY approach? EcksMark Media tends to look at kit from an if we can build it ourselves we will do mindset. From creating monitor hoods to custom cables, we will try making what we can to save money. Then, if we don’t use it we haven’t wasted much money, and if we use it a lot then we can invest in high-end equipment. This is how we built our own DIY Wireless Directors Monitor.
The idea of a DIY Wireless Directors Monitor came recently while using a TeraDek Solution on a film. For such a simple thing it seemed overly expensive and cumbersome. Surely there is an easier way to get a good clear image into the hands off the director.
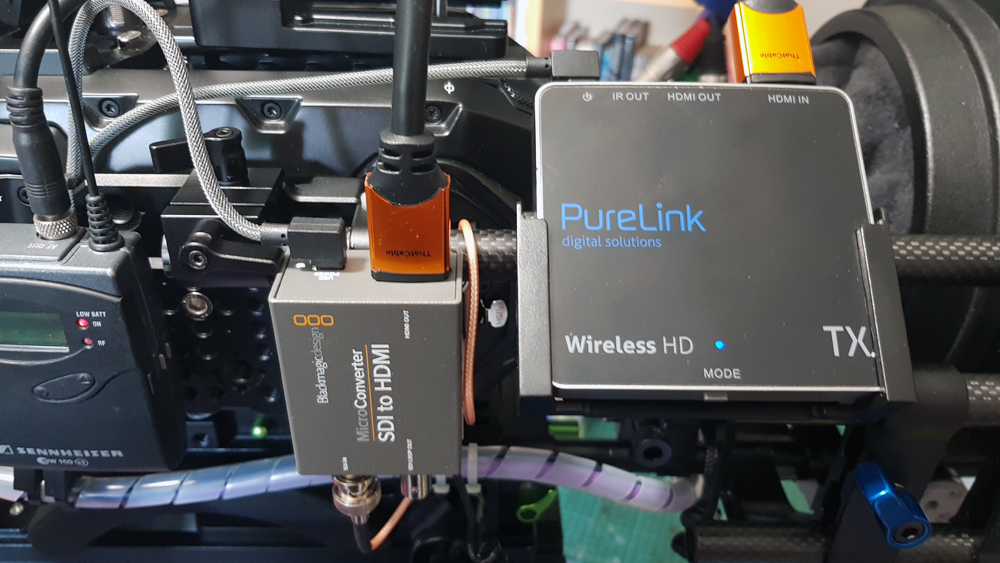
The first hurdle was to find a wireless transmission system that was uncompressed, at least 1080p, and will run on low power, preferably USB. Without this nothing could move forward. The PureLink CSW110 wireless HDMI came to the rescue. We were lucky enough to pick one up second hand that had been used once to run a feed to a big screen at an event. Normally around £270, we paid £60 for it. From here we needed a good SDI to HDMI converter that was small and would run off low power USB. The Blackmagic SDI to HDMI converter was perfect and will run off 5v 0.5A. The rest was a case of finding what was needed to connect everything together.
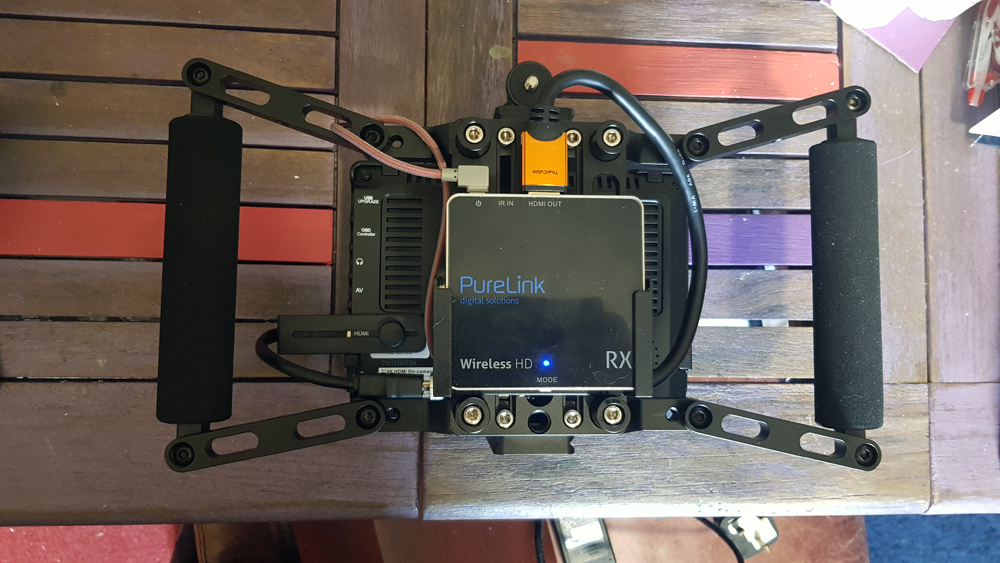
The Transmitter Side
We already had the Smallrig side plate on the Blackmagic URSA Mini Pro. We opted for the NATO rail to 15mm Rail Clamp and a carbon fibre rail to mount all the camera side hardware, all parts by Smallrig. We did need to chop a few inches off the rail to make it fit nicely, but that wasn’t too much of a problem. Then we grabbed a few 15mm rails to 1/4 inch adaptors. Taking out the ¼ thread left us with a good flat mounting surface so we could epoxy them on to the SDI to HDMI converter and the PureLink Transmitter mount.
 Finding short cables is harder than you think and a lot more expensive for less length. We eventually picked up two 30cm HDMI cables and an SDI cable. Both are a little bit longer than needed but the best solution for the price. The D-Tap to USB power was fairly easy to find if a little long, but with some wire cutters and soldering it was cut down to size. The converter and transmitter both use 0.5a at 5v, so not a taxing load on the regulator and battery.
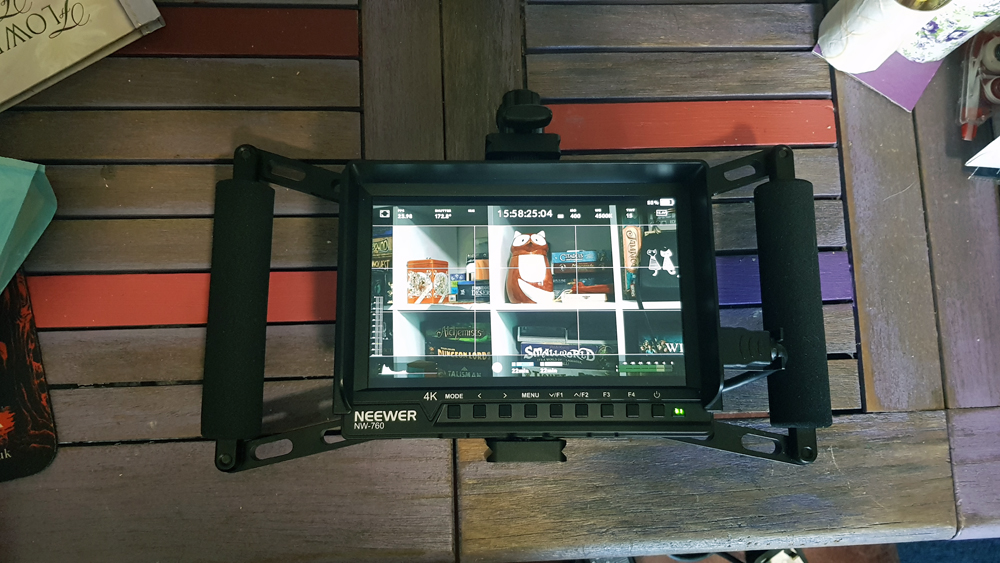
The Reciever Side
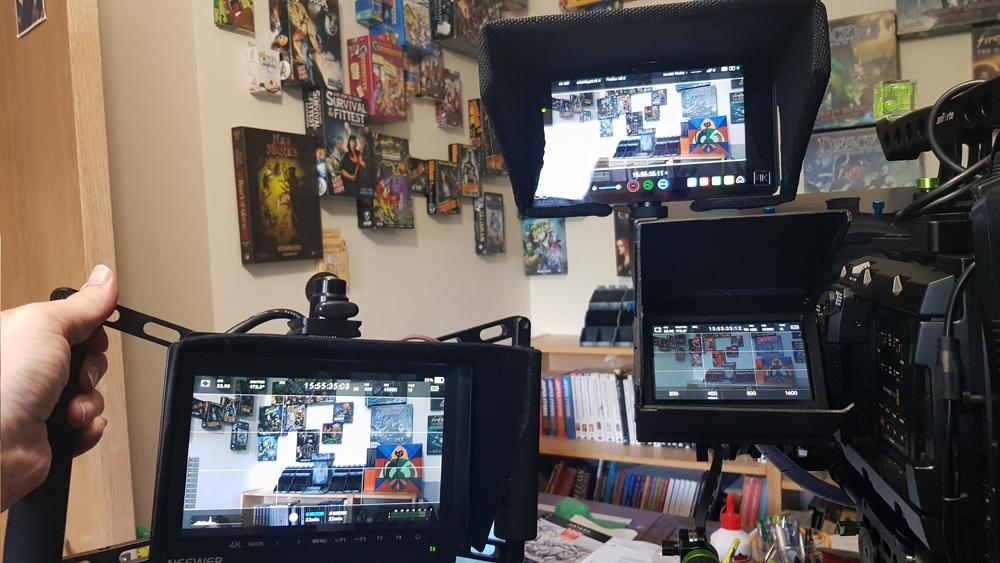
On the monitor side, we started with a monitor cage, with grips by Neewer (who are rapidly becoming our favourite budget brand). This cage is sturdy and has a lot of mounting points for adaptability. We epoxyed the PureLink receiver mounting and an HDMI to HDMI block on there to make wire routing easier. The monitor runs on 7.4v NP-F batteries so we needed to get a regulator to step that down to 5v. It was a pain to source a small single component solution for this, and we had to order one from Germany. We picked up a Recom R-78W50-05 regulator, a single component solution that comes in a small package.
 We appropriated a female USB port from a dead battery bank and were set to modify the monitor’s mounting plate to have a 5v 0.5A USB port. Luckily there is just enough space in the NP-F mounting plate for the regulator or a USB port. A bit of soldering and hot glue later the Neewer NW-760 was able to power the receiver. With a few minor adaptations and a bit more epoxy, it was ready as a compact portable director’s monitor.
DIY Wireless Directors Monitor Conclusion
Overall there weren’t any issues with this project. We were expecting to get some major problems getting 5v power to everything, but luckily we picked the right parts and the Recom regulator saved a lot of hassle. We highly recommend them as they will take anything from 36v to 6v and drop it down to 5v. This would also be suitable for a 12v D-Tap regulator or even dropping down a 24v signal. Although the higher the voltage the more heat it will output, we will be using this regulator a lot in the future.
For a low-cost Wireless Directors Monitor, this solution is better than we expected. The only downside is about 0.25 seconds lag, this is more than likely from the wireless transmission system. This lag is acceptable as it’s not going to be used by a focus puller. The Neewer NW-760 is a lot better than we expected, it will take 1080p 60fps, and has false colour (which is a great cheap solution if your camera doesn’t have the false colour option). It has focus and exposure assist, and you can tweak the individual colours to match the output of your camera. And with a crisp bright image, we would recommend the Neewer NW-760 to anyone who wants a cheap HDMI monitor solution.
Amazon links to the parts I used:
Purelink Wireless HDMI CSW110 – https://amzn.to/2LSgz1y
Blackmagic SDI to HDMI converter – https://amzn.to/2OL4mK2
Neewer Monitor Cage – https://amzn.to/2vjMoGf
SmallRig 15mm Rails – https://amzn.to/2AIHKH9
NATO to 15mm rail Clamp – https://amzn.to/2neJpL2
ThatCable HDMI to HDMI – https://amzn.to/2vj7epq
SDI to SDI Cable – https://amzn.to/2OI4kT3
Neewer 7” NW-760 Monitor – https://amzn.to/2AIrC8j
BAXXTAR NP-F750 x 4 Batteries – https://amzn.to/2OIa4MG
D-Tap to USB Power – https://amzn.to/2OKf4Aw
Recom R-78W50-05 regulator (not on Amazon) – https://tinyurl.com/y8ayyyd9
HDMI to HDMI block – https://amzn.to/2AEqDpT